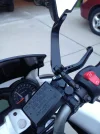
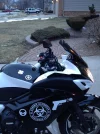
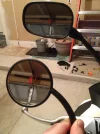
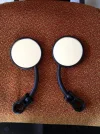
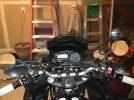
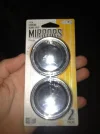
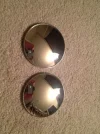
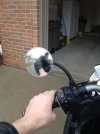
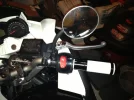
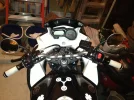
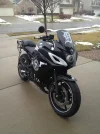
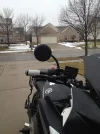
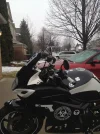
For the last few months I've been researching new mirrors and have tried a few setups with another on the way. I was feeling ambitious when I started this but had no idea how many revisions or how long it would take. This will require several posts to fit all the pics in and to break each revision down enough to hopefully make some sense. Here goes nothin'...
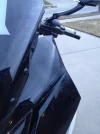
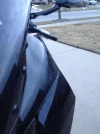
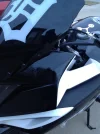
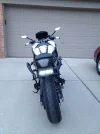
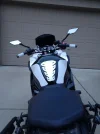
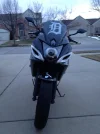
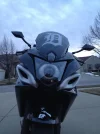
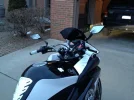
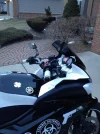
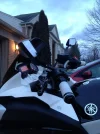
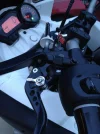
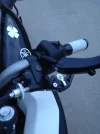
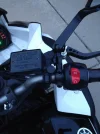
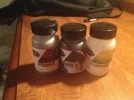
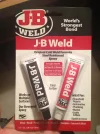
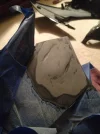
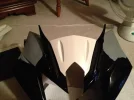
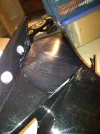
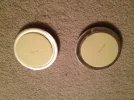
Instead of simply removing the stock mirrors and installing block offs, I decided to epoxy over the holes, sand them down, and paint over them. Simple, right? Not so much, at least not for me. I got the paint from colorrite.com to get an OEM match but then realized I needed to buy primer and clear coat as well as the paint. I used J-B Weld epoxy (but had to buy a second set to finish the job), 60, 80, and 220 grit sandpaper, several different kinds of sponges/brushes for the painting portion, tape to cover the hole from beneath so the epoxy had something to stick to, painter's tape, and a putty knife to apply the epoxy.
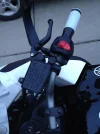
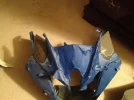
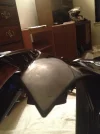
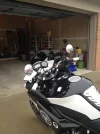
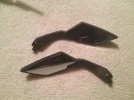
1. Removed fairing and mirrors
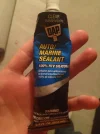
2. Applied tape to the inside of the mirror hole so the epoxy had a base to stick to
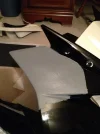
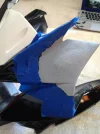
3. Tapped off area
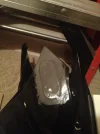
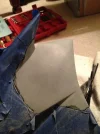
4. Applied 1st coat of epoxy w/ putty knife and let dry 24hrs
5. Applied 2nd coat of epoxy w/ putty knife and let dry 24hrs
6. Sanded down epoxy to a smooth finish
7. Applied 3rd coat of epoxy w/ putty knife and let dry 24hrs
8. Sanded down epoxy to a smooth finish
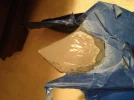
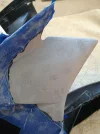
9. Applied several coats of primer and let dry over night
10. Sanded down primer to a smooth finish
11. Applied several more coats of primer and let dry overnight
12. Sanded down primer to a smooth finish
13. Spot treated still exposed spots with primer and let dry for several hours
14. Sanded final bit of primer to a smooth finish
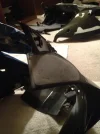
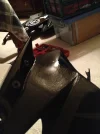
15. Applied several coats of paint waiting 30 min or so in-between coats then let dry overnight
16. Applied several coats of clear coat waiting 30 min or so in-between coats then let dry overnight
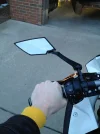
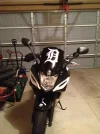
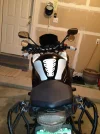
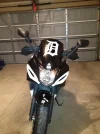
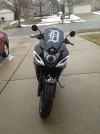
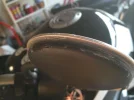
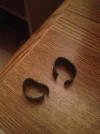
I ran into several issues along the way. Even though I tapped the area off, each time I sanded or applied anything the area affected kept getting bigger and bigger. I needed a somewhat larger area than just the exposed hole so that I could get a gradual slope to blend in the hump that was left, but ended up with an affected area much larger than I anticipated. Also, the paint did not go on smoothly. It did somewhat at first when I used the sponge paintbrush, but that device kept stripping away the coat of paint underneath it whenever I tried applying a new coat, thus exposing primer. I used several different small paint brushes to hopefully get a better finish but I could not get a smooth finish with them. The result was a bumpy finish that I had to settle for. If I could do it over I would use the spray can version from color rite, however I think I would then need to repaint the entire front fairing to get an even finish. Even though it is OEM paint, I'm sure it would not quite match the rest of the bike since a spray can paint job is not the same as having the pieces professionally painted. It still blends in quite well that sometimes I even forget that it didn't come out that great because when I'm around the bike I don't even notice it. Someday I will have it professionally re-done, but for now it was an experiment that came out good enough. And I had fun doing it.
That was the first step of this long journey. The following posts will be the different mirror setups I tried using.
Instead of simply removing the stock mirrors and installing block offs, I decided to epoxy over the holes, sand them down, and paint over them. Simple, right? Not so much, at least not for me. I got the paint from colorrite.com to get an OEM match but then realized I needed to buy primer and clear coat as well as the paint. I used J-B Weld epoxy (but had to buy a second set to finish the job), 60, 80, and 220 grit sandpaper, several different kinds of sponges/brushes for the painting portion, tape to cover the hole from beneath so the epoxy had something to stick to, painter's tape, and a putty knife to apply the epoxy.
1. Removed fairing and mirrors
2. Applied tape to the inside of the mirror hole so the epoxy had a base to stick to
3. Tapped off area
4. Applied 1st coat of epoxy w/ putty knife and let dry 24hrs
5. Applied 2nd coat of epoxy w/ putty knife and let dry 24hrs
6. Sanded down epoxy to a smooth finish
7. Applied 3rd coat of epoxy w/ putty knife and let dry 24hrs
8. Sanded down epoxy to a smooth finish
9. Applied several coats of primer and let dry over night
10. Sanded down primer to a smooth finish
11. Applied several more coats of primer and let dry overnight
12. Sanded down primer to a smooth finish
13. Spot treated still exposed spots with primer and let dry for several hours
14. Sanded final bit of primer to a smooth finish
15. Applied several coats of paint waiting 30 min or so in-between coats then let dry overnight
16. Applied several coats of clear coat waiting 30 min or so in-between coats then let dry overnight
I ran into several issues along the way. Even though I tapped the area off, each time I sanded or applied anything the area affected kept getting bigger and bigger. I needed a somewhat larger area than just the exposed hole so that I could get a gradual slope to blend in the hump that was left, but ended up with an affected area much larger than I anticipated. Also, the paint did not go on smoothly. It did somewhat at first when I used the sponge paintbrush, but that device kept stripping away the coat of paint underneath it whenever I tried applying a new coat, thus exposing primer. I used several different small paint brushes to hopefully get a better finish but I could not get a smooth finish with them. The result was a bumpy finish that I had to settle for. If I could do it over I would use the spray can version from color rite, however I think I would then need to repaint the entire front fairing to get an even finish. Even though it is OEM paint, I'm sure it would not quite match the rest of the bike since a spray can paint job is not the same as having the pieces professionally painted. It still blends in quite well that sometimes I even forget that it didn't come out that great because when I'm around the bike I don't even notice it. Someday I will have it professionally re-done, but for now it was an experiment that came out good enough. And I had fun doing it.
That was the first step of this long journey. The following posts will be the different mirror setups I tried using.
Attachments
-
 IMG_0230.webp89.9 KB · Views: 54
 -
 IMG_2097.webp78.1 KB · Views: 49
 -
 IMG_2098.webp79.9 KB · Views: 60
 -
 IMG_2107.webp84.7 KB · Views: 58
 -
 IMG_2108.webp95.6 KB · Views: 76
 -
 IMG_2109.webp89.6 KB · Views: 59
 -
 IMG_2121.webp70.9 KB · Views: 62
 -
 IMG_2122.webp71.5 KB · Views: 62
 -
 IMG_2126.webp66.6 KB · Views: 77
 -
 IMG_2124.webp79.7 KB · Views: 74


")