
cocosrandom
Member
R6 Rearsets mod
I’m making this write up from individuals that requested it from my previous post. I didn’t take pictures as I was installing but I will take a lot more so that you may see how they were installed.
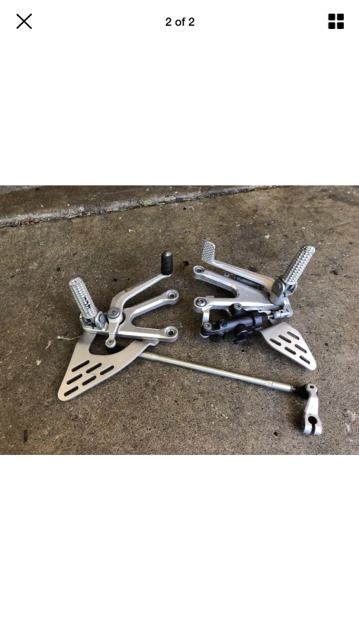
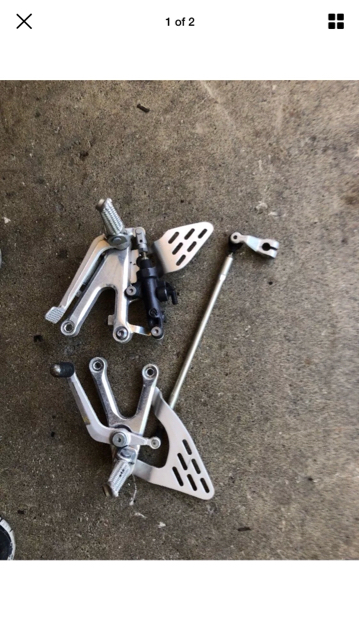
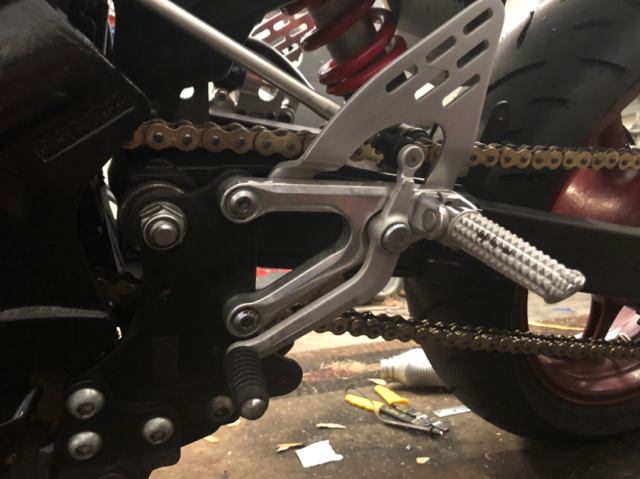
Here is the rearsets I bought they are from 03-09 R6. I bought them with all you see attached to them and I recommend you do the same it makes things a lot easier.
Tools Needed:
*Metric Allen key set
*Various wrenches (depending on what size nut you use)
*Wire brush or a bench grinder with a wire wheels (I used the bench grinder cause it was faster)
*Loctite (Absolutely need this)
*Tape Measure or Ruler (used when mounting the rearset to measure from the front of the bracket to the rearset itself.
*x2 nuts
*Step up bit or various drill bits.
(You are going to have to drill through hardened steel so good drill bits make it a lot easier)
For this How to make absolutely sure you keep all the hardware you remove a lot of it will be reused later in this how to.
1. I started on the shifting side cause it was a little more difficult then the brake side.
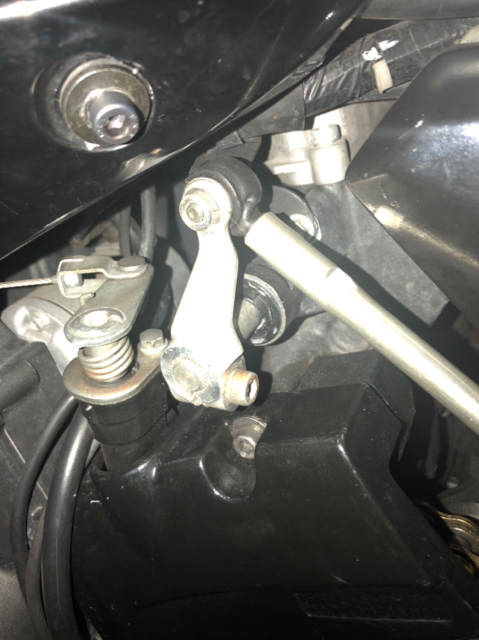
2. Disconnect the bolt that holds the shifting rod onto the actual shift shaft.
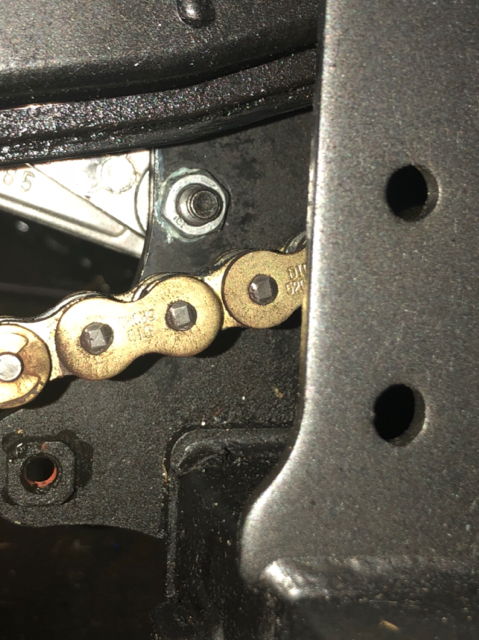
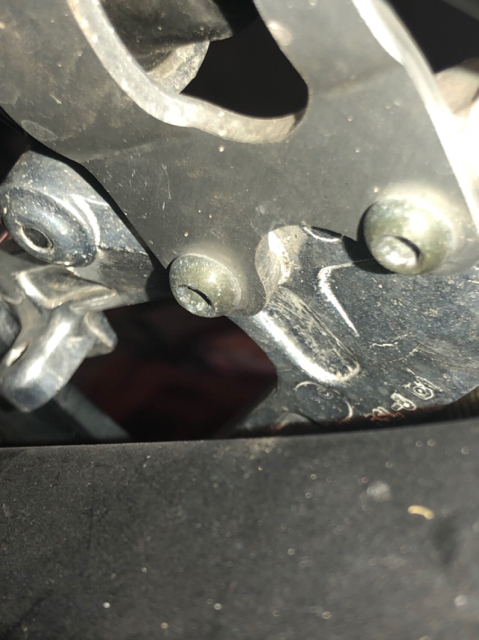
3. Remove all three Allen key bolts from the front of the (shifting side factory rearset).
4. Remove the shift pedal bolt that it pivots on.
5. You should now be able to remove that entire side.
6. You will need to clean the old loctite off the hex bolts you removed with a wire wheel or bench grinder. This is important cause you want the new loctite to seal well.
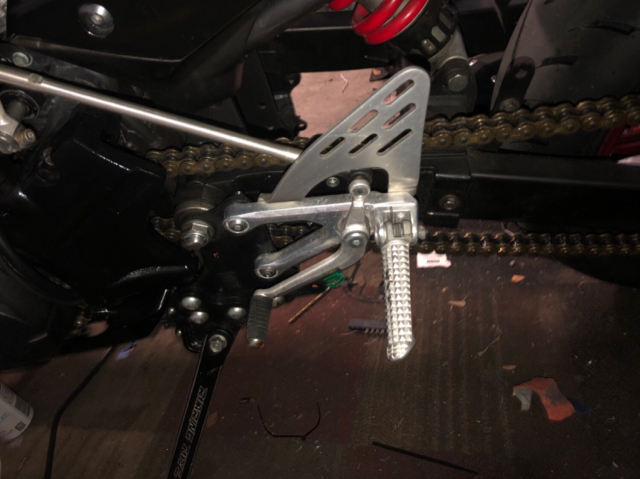
7. Take the same side R6 rearset and Mount the top hole of the rearset to the existing top hole from the factory rearsets. Do not loctite it yet.
8. Tighten the top bolt until the rearset it self barely moves.
9. Now here comes the pain in the butt part but take your time and it helps to have a buddy.
10. Connect the R6 shifting hardware to your shift shaft ensure its securely on there.

11. Mount the bike and move the rearset where it’s comfortable for you it will pivot on the top bolt you installed earlier.
12. Once you have it where you like it have your buddy clamp it on the bottom to hold it straight or in place.
13. Don’t attempt to put the bottom bolt in yet.
14. With the R6 Rearset clamped Mount the bike again and ensure you can go through all the gears. You may have to adjust the shift rod from the R6 a bit. I had to start mine for some reason the first time to get it to go in 1st.
15. Once it goes through all the gears and your comfortable mark the bottom hole with a marker.
16. Remove everything you just installed from the R6.
17. IMPORTANT: check the hole you marked and make sure it is far enough forward that you have enough metal left at the back of the factory bracket.
18. Drill a small pilot hole and I made it bigger with a step up bit.
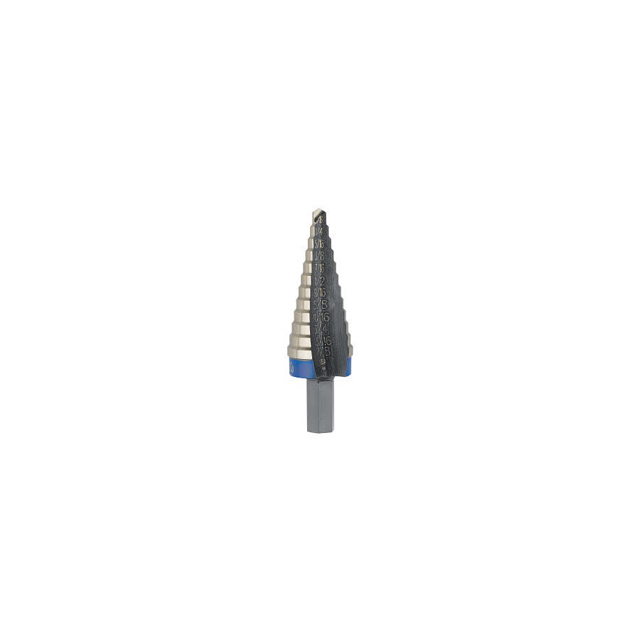
19. Once the whole is drilled clean the burrs out and try to put one of the FZ6R bolts that you removed through it.
20. Once that is done remount rearset and apply loctite to the top bolt place the bottom bolt in and loctite it as well put one of the nuts on the backside of the bottom bolt.
21. Tighten to your liking I didn’t use a specific torque.
22. Once everything is put back together take it for a ride and make sure you can get through all the gears smoothly. You are going to have a different rearset on both sides so it may feel weird but at this point you’re only paying attention to the side you just put on.
23. If you like it you can move to the other side if you do not adjust as needed. Adjust either the R6 shift rod jam nuts or where it mounts to the motorcycle shift shaft or both.
*Moving on to the brake side.
Disclaimer: mine did not have the pull cable that should be mounted to turn the brake light on when you depress the brake pedal. I ordered one but I will show you how to mount it anyway.
When you put it on you will need to adjust the cable so it reaches where it needs to hook up.
1. It is the same process to remove the right side besides removing the bracket for the pull cable I spoke of earlier.
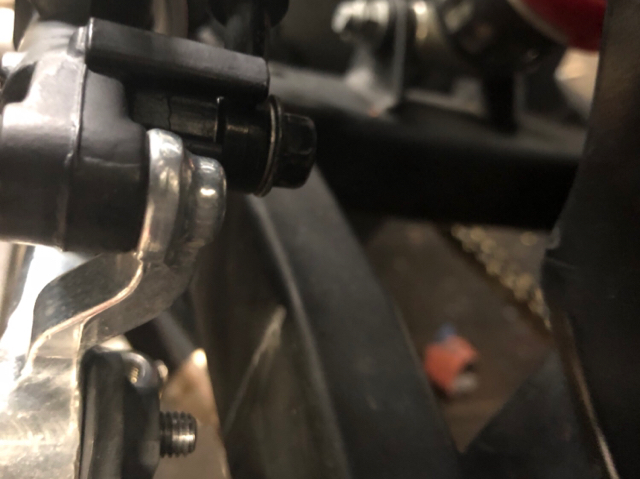
2. Once the right side rearset is removed disconnect the supply line and the banjo bolt from the brake master cylinder. The feed tube and the banjo bolt mount right to the R6 master cylinder.

3. Installing the bolts that hold the rearset is the same process as the left side paying very close attention to where the bottom hole is drilled.
4. Remove the small side fairing on the brake side just under the seat. I only removed the one Allen key bolt and there is a 10mm behind there that hold the fluid reservoir remove that as well.
5. Once everything is mounted bleed your rear brake. I did mine the old fashioned way but you can use a vacuum pump as well.
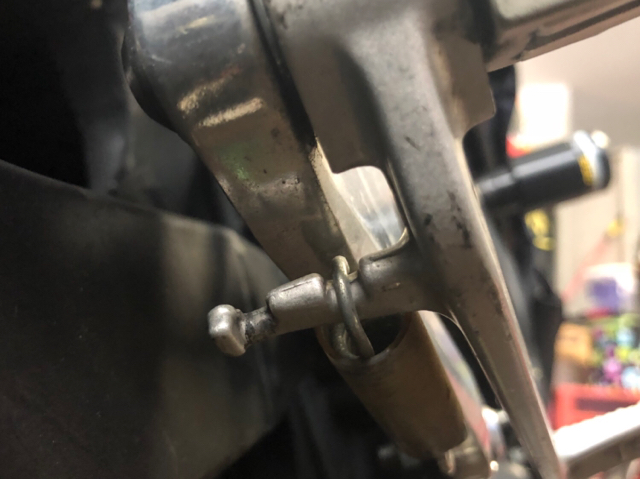
6. There are 2 Allen key bolts that hold the ankle guard on the backside of the rearset. You will need to remove one of those bolts to mount the pull cable bracket for the rear brake light. You will see the detent in the pedal where the spring connects.
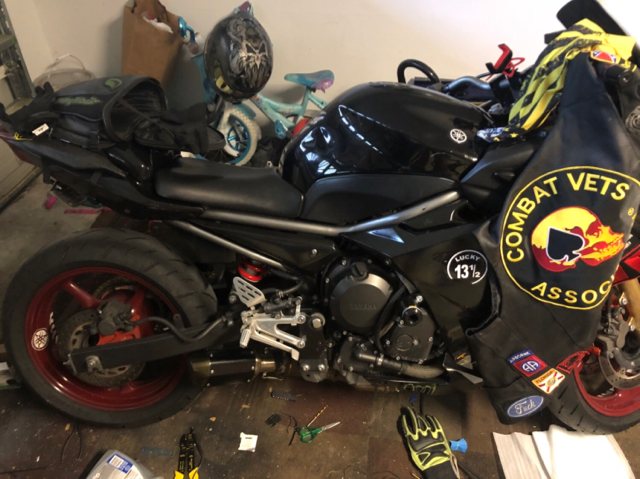
The riding position in my opinion is way better my legs sit higher but you don’t have to worry about peg drag. The shifting response is way better especially down shifting takes no effort at all. I will be installing woodcraft clipons in the next couple weeks so I will be able to let you know how much of a factor that will play.
I’m open to any improvements to this post this is the first time making a write up or if you know of better ways to mod it please let me know.
I am not responsible for any damage made to your bike doing this modification. Complete at your own risk.
I put about 200 miles on them since the install. I have checked the hardware roughly every 50-75 miles everything has remained tight and I have had no problems at all with them
Sent from my iPhone using Tapatalk
I’m making this write up from individuals that requested it from my previous post. I didn’t take pictures as I was installing but I will take a lot more so that you may see how they were installed.
Here is the rearsets I bought they are from 03-09 R6. I bought them with all you see attached to them and I recommend you do the same it makes things a lot easier.
Tools Needed:
*Metric Allen key set
*Various wrenches (depending on what size nut you use)
*Wire brush or a bench grinder with a wire wheels (I used the bench grinder cause it was faster)
*Loctite (Absolutely need this)
*Tape Measure or Ruler (used when mounting the rearset to measure from the front of the bracket to the rearset itself.
*x2 nuts
*Step up bit or various drill bits.
(You are going to have to drill through hardened steel so good drill bits make it a lot easier)
For this How to make absolutely sure you keep all the hardware you remove a lot of it will be reused later in this how to.
1. I started on the shifting side cause it was a little more difficult then the brake side.
2. Disconnect the bolt that holds the shifting rod onto the actual shift shaft.
3. Remove all three Allen key bolts from the front of the (shifting side factory rearset).
4. Remove the shift pedal bolt that it pivots on.
5. You should now be able to remove that entire side.
6. You will need to clean the old loctite off the hex bolts you removed with a wire wheel or bench grinder. This is important cause you want the new loctite to seal well.
7. Take the same side R6 rearset and Mount the top hole of the rearset to the existing top hole from the factory rearsets. Do not loctite it yet.
8. Tighten the top bolt until the rearset it self barely moves.
9. Now here comes the pain in the butt part but take your time and it helps to have a buddy.
10. Connect the R6 shifting hardware to your shift shaft ensure its securely on there.
11. Mount the bike and move the rearset where it’s comfortable for you it will pivot on the top bolt you installed earlier.
12. Once you have it where you like it have your buddy clamp it on the bottom to hold it straight or in place.
13. Don’t attempt to put the bottom bolt in yet.
14. With the R6 Rearset clamped Mount the bike again and ensure you can go through all the gears. You may have to adjust the shift rod from the R6 a bit. I had to start mine for some reason the first time to get it to go in 1st.
15. Once it goes through all the gears and your comfortable mark the bottom hole with a marker.
16. Remove everything you just installed from the R6.
17. IMPORTANT: check the hole you marked and make sure it is far enough forward that you have enough metal left at the back of the factory bracket.
18. Drill a small pilot hole and I made it bigger with a step up bit.
19. Once the whole is drilled clean the burrs out and try to put one of the FZ6R bolts that you removed through it.
20. Once that is done remount rearset and apply loctite to the top bolt place the bottom bolt in and loctite it as well put one of the nuts on the backside of the bottom bolt.
21. Tighten to your liking I didn’t use a specific torque.
22. Once everything is put back together take it for a ride and make sure you can get through all the gears smoothly. You are going to have a different rearset on both sides so it may feel weird but at this point you’re only paying attention to the side you just put on.
23. If you like it you can move to the other side if you do not adjust as needed. Adjust either the R6 shift rod jam nuts or where it mounts to the motorcycle shift shaft or both.
*Moving on to the brake side.
Disclaimer: mine did not have the pull cable that should be mounted to turn the brake light on when you depress the brake pedal. I ordered one but I will show you how to mount it anyway.
When you put it on you will need to adjust the cable so it reaches where it needs to hook up.
1. It is the same process to remove the right side besides removing the bracket for the pull cable I spoke of earlier.
2. Once the right side rearset is removed disconnect the supply line and the banjo bolt from the brake master cylinder. The feed tube and the banjo bolt mount right to the R6 master cylinder.
3. Installing the bolts that hold the rearset is the same process as the left side paying very close attention to where the bottom hole is drilled.
4. Remove the small side fairing on the brake side just under the seat. I only removed the one Allen key bolt and there is a 10mm behind there that hold the fluid reservoir remove that as well.
5. Once everything is mounted bleed your rear brake. I did mine the old fashioned way but you can use a vacuum pump as well.
6. There are 2 Allen key bolts that hold the ankle guard on the backside of the rearset. You will need to remove one of those bolts to mount the pull cable bracket for the rear brake light. You will see the detent in the pedal where the spring connects.
The riding position in my opinion is way better my legs sit higher but you don’t have to worry about peg drag. The shifting response is way better especially down shifting takes no effort at all. I will be installing woodcraft clipons in the next couple weeks so I will be able to let you know how much of a factor that will play.
I’m open to any improvements to this post this is the first time making a write up or if you know of better ways to mod it please let me know.
I am not responsible for any damage made to your bike doing this modification. Complete at your own risk.
I put about 200 miles on them since the install. I have checked the hardware roughly every 50-75 miles everything has remained tight and I have had no problems at all with them
Sent from my iPhone using Tapatalk
Last edited: