
Some people like me, had trouble finding a full write up on how to install these darn things. So I'm just doing a little write up, not a whole lot of pictures because i didn't have my camera on me but I took some of what I could.
Prep Work, Before you begin.
Tools and items you'll need is the same as my other thread:
-Hex Key, Allen Key
-Socket Wrench (for the seat, and headlight).
-Philips Head (4 Way Screw driver)
-Gloves (So you don't get your natural oily skin on the bulb)
-Containers (for screws, trust me on this one... I had a few extra)
-Drinks/Food
Step 1: removal
As mentioned by JonKerr of this forum:
After you remove both side panels, you remove the air intake plastics. When you remove the side fairing, you'll see 4 or 5 screws that require a 4-way or Philips Head screw driver. Unscrew these and then take off the air scoop plastic.
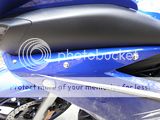
Looks like this:
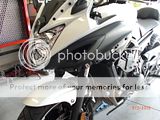
After you take off the sides, you now want to start working on the dash. Take off the dash side plastics:
This is taken off by a hex key bolt and a plastic quick screw, then slide the plastic off.
The dash is next, held on by the same thing. A quick screw and a hex key bolt:
After that, slide the dash out and over the gauges and set it aside.
The mirrors are easy to remove, as they're only held on by 2 nuts for each mirror. Unscrew these and the mirror will come right out, I used my socket wrench for this, just have to move the handlebars to get some room.
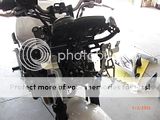
Next, you'll be on the ground looking up at the bike to see what's underneath. You should see a plug going in to the bulb to connect it to the power, as that's the only wire connecting to the headlight unit. Just pull that sucker out like a wall cord because that's basically what it is.
The only thing you have left on there is the headlight. DON"T unscrew the philips head screws in the headlight display, it's a waste of time. If you look there's 4 bolts that hold the headlight unit in place. They're bolted on to a silver/metal frame bracket. You're gonna want to stick your socket wrench in there and unscrew those bolts.
After that gently pull the head unit off and take it to a bench or table and work on it there.
The bulb itself is covered in a rubber rain/weather protector. I used the two little stubs that stuck out and pulled it off. After you get that big thing off you'll see a little metal/paper clip spring that holds the bulb in place. Push down on the right side of the spring and unhook it, then pull it to the left. Take the bulb out.
Step 2: Installing it
With rubber gloves on so you don't touch the bulb. Take off the plastic cylinder case of the HID bulb. And put in the headlight like the stock bulb, also, it might be a little tough but you can put the spring over it again to lock it in place instead of unscrewing the spring and screwing it back in. For the weather rubber protector, I just stuck it over the new bulb and electrical tape the hole so no water gets in.
If you're unsure about how the ballasts connect, look at the wires with the instructions and they should clip together. Unlike the stock bulb where the 3 prong wall cord connects directly to the bulb, the bike's connector will connect to the ballast instead.
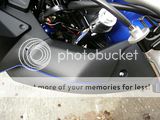
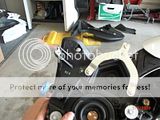
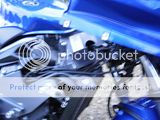
Now you're going to want to think of where you're going to mount the ballast, making sure that it doesn't interfere with the steering. Some members say you can just use one, but I used two since mine came with two and I think if you only used one you'll just get the low beam. I mounted mine on the front with the double stick tape that came with:
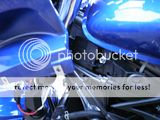
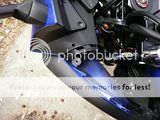
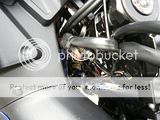
And the other side here:
Move your steering left and right to see if it hits it or interferes with it, if it does then you're in trouble.
You're going to have to run the 2 Positive and Negative wires through the body, using zip ties/cable ties to hide it there and to the battery.
Now put the head unit back on and screw in the 4 bolts. Connect everything together, and test out your work.
Step 3: Putting everything back together
Go reverse order when you put everything back together, starting from the dash first and the side fairings last.
Here's where I cable tied the wires in the front:
Prep Work, Before you begin.
Tools and items you'll need is the same as my other thread:
-Hex Key, Allen Key
-Socket Wrench (for the seat, and headlight).
-Philips Head (4 Way Screw driver)
-Gloves (So you don't get your natural oily skin on the bulb)
-Containers (for screws, trust me on this one... I had a few extra)
-Drinks/Food
Step 1: removal
As mentioned by JonKerr of this forum:
So, basically you take all of the fairings off. If you haven't done frame sliders yet, here's my frame slider thread: http://www.600cc.org/forum/f91/fz6r-how-install-no-cut-frame-sliders-18569/First thing to do is pull ALL the plastic off the bike. Fairings, fake ram air intakes, mirrors, inner fairing covers, everything. When you go to take the front fairing off, you can just unbolt the 4 main bolts holding the headlight assembly onto the bike. You don't have to take the fairing off the headlight unless you want to. After you unplug the headlight from the main plug, and can take the assembly to a work bench
After you remove both side panels, you remove the air intake plastics. When you remove the side fairing, you'll see 4 or 5 screws that require a 4-way or Philips Head screw driver. Unscrew these and then take off the air scoop plastic.

Looks like this:

After you take off the sides, you now want to start working on the dash. Take off the dash side plastics:

This is taken off by a hex key bolt and a plastic quick screw, then slide the plastic off.
The dash is next, held on by the same thing. A quick screw and a hex key bolt:

After that, slide the dash out and over the gauges and set it aside.
The mirrors are easy to remove, as they're only held on by 2 nuts for each mirror. Unscrew these and the mirror will come right out, I used my socket wrench for this, just have to move the handlebars to get some room.
Next, you'll be on the ground looking up at the bike to see what's underneath. You should see a plug going in to the bulb to connect it to the power, as that's the only wire connecting to the headlight unit. Just pull that sucker out like a wall cord because that's basically what it is.

The only thing you have left on there is the headlight. DON"T unscrew the philips head screws in the headlight display, it's a waste of time. If you look there's 4 bolts that hold the headlight unit in place. They're bolted on to a silver/metal frame bracket. You're gonna want to stick your socket wrench in there and unscrew those bolts.

After that gently pull the head unit off and take it to a bench or table and work on it there.
The bulb itself is covered in a rubber rain/weather protector. I used the two little stubs that stuck out and pulled it off. After you get that big thing off you'll see a little metal/paper clip spring that holds the bulb in place. Push down on the right side of the spring and unhook it, then pull it to the left. Take the bulb out.

Step 2: Installing it
With rubber gloves on so you don't touch the bulb. Take off the plastic cylinder case of the HID bulb. And put in the headlight like the stock bulb, also, it might be a little tough but you can put the spring over it again to lock it in place instead of unscrewing the spring and screwing it back in. For the weather rubber protector, I just stuck it over the new bulb and electrical tape the hole so no water gets in.
If you're unsure about how the ballasts connect, look at the wires with the instructions and they should clip together. Unlike the stock bulb where the 3 prong wall cord connects directly to the bulb, the bike's connector will connect to the ballast instead.
Now you're going to want to think of where you're going to mount the ballast, making sure that it doesn't interfere with the steering. Some members say you can just use one, but I used two since mine came with two and I think if you only used one you'll just get the low beam. I mounted mine on the front with the double stick tape that came with:

And the other side here:

Move your steering left and right to see if it hits it or interferes with it, if it does then you're in trouble.
You're going to have to run the 2 Positive and Negative wires through the body, using zip ties/cable ties to hide it there and to the battery.
Now put the head unit back on and screw in the 4 bolts. Connect everything together, and test out your work.
Step 3: Putting everything back together
Go reverse order when you put everything back together, starting from the dash first and the side fairings last.
Here's where I cable tied the wires in the front:

Last edited: