
Chris12
New Member
I've already posted this write-up in my "mod" thread, but I made a new video and figured out how to embed media, so I wanted to repost it. I feel that other members wanting to change their stock flasher relay (to fix hyper flash after led installation) will benefit from this write-up, and the repost will benefit those searching thread titles.
Here is my newly edited and uploaded video that I made for both myself and CustomLED:
[ame]http://m.youtube.com/watch?v=Ko6M8TO6lz4[/ame]
Below is my install write-up with photos.
I installed my CustomLED ELFR-P 10-Pattern Programmable Electronic LED Flasher Relay with OEM Connector today and it was very easy. I knew that the unit required a dedicated ground which made me a bit uneasy but it worked out great.
ELFR-P Programmable Electronic LED Flasher Relay with OEM Connector Custom LED
Here's a quick run-down on how I installed the elfr-p on my 2012 FZ6r and a few videos of the 10 different functions.
This is the stock flasher unit underneath the rear passenger seat. The OEM unit is still mounted, but I already have it disconnected.

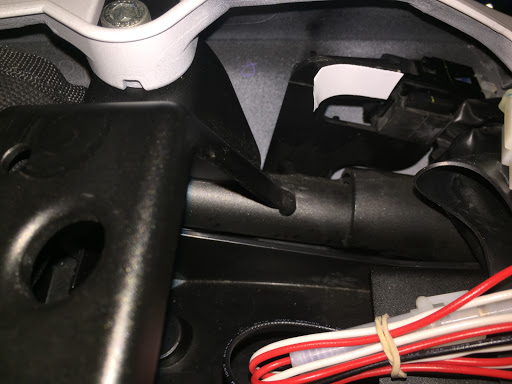
Here is the area where the stock flasher unit resided, and where I'll mount the elfr-p.

Here's the stock flasher unit. It's attached to a rubber mount and the rubber mount attaches to the bike.

These 10mm nuts are conveniently located in the same compartment. I removed the one closest to the front of the bike and ran the ground under the plastic/rubber shielding to the stud.

Here's the ground terminal slipped over the stud.

Next, I used the supplied two sided tape to mount the elfr-p to the stock location. Note the white rectangle - that's the two sided take as I begin to peel the backing.
And finally, here is the unit mounted. The dial is easily accessible to change the blinker/ signal pattern (when the rear seat is removed).

I was very impressed with the way the elfr-p worked with my Motodynamic rear led tail in the sequential turn setting. My first video shows this:
[ame]http://m.youtube.com/watch?v=WjoOufy1-OI[/ame]
My second video is focused on my Yamaha LED Plus front turn signal:
[ame]http://m.youtube.com/watch?v=O_ynLGoeBUE[/ame]
Here is my newly edited and uploaded video that I made for both myself and CustomLED:
[ame]http://m.youtube.com/watch?v=Ko6M8TO6lz4[/ame]
Below is my install write-up with photos.
I installed my CustomLED ELFR-P 10-Pattern Programmable Electronic LED Flasher Relay with OEM Connector today and it was very easy. I knew that the unit required a dedicated ground which made me a bit uneasy but it worked out great.
ELFR-P Programmable Electronic LED Flasher Relay with OEM Connector Custom LED
Here's a quick run-down on how I installed the elfr-p on my 2012 FZ6r and a few videos of the 10 different functions.
This is the stock flasher unit underneath the rear passenger seat. The OEM unit is still mounted, but I already have it disconnected.
Here is the area where the stock flasher unit resided, and where I'll mount the elfr-p.
Here's the stock flasher unit. It's attached to a rubber mount and the rubber mount attaches to the bike.
These 10mm nuts are conveniently located in the same compartment. I removed the one closest to the front of the bike and ran the ground under the plastic/rubber shielding to the stud.
Here's the ground terminal slipped over the stud.
Next, I used the supplied two sided tape to mount the elfr-p to the stock location. Note the white rectangle - that's the two sided take as I begin to peel the backing.
And finally, here is the unit mounted. The dial is easily accessible to change the blinker/ signal pattern (when the rear seat is removed).
I was very impressed with the way the elfr-p worked with my Motodynamic rear led tail in the sequential turn setting. My first video shows this:
[ame]http://m.youtube.com/watch?v=WjoOufy1-OI[/ame]
My second video is focused on my Yamaha LED Plus front turn signal:
[ame]http://m.youtube.com/watch?v=O_ynLGoeBUE[/ame]
