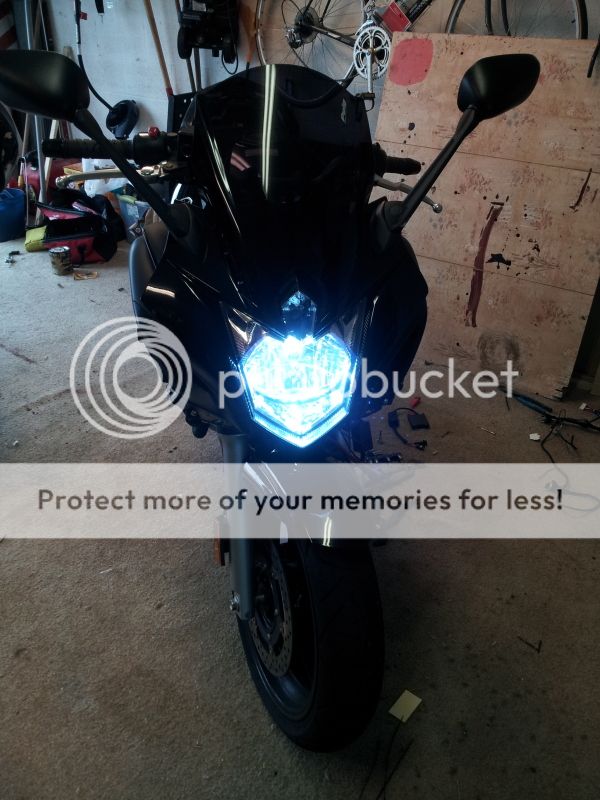
Since the FZ6R had all its fairings stripped down due to an accident early in the week i figured it was a good time to do a HOW TO install for this HID kit on the bike.
The kit is a 5000k HID kit from AggRacing (AggRacing.com), i have one of these kits on my R6 and absolutely love the light output and the quality of the product. I ordered a bixeon so that i could keep the HID lighting and still retain a High/Low beam, this kit can also be ordered in a single ballast/bulb configuration but i figured i could put this kit to use on another bike with some modifications down the road.
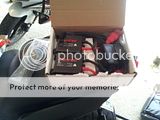
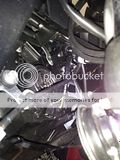
Here is what came with my kit,
Tools/Materials required:
Hex keys
Patients
Extra Wiring (i used some 14 gauge)
Electrical connectors (Butt splices, spades, etc)
Heat-shrink Tubing (optional)
Step 1:
Remove the left side fairings (should be a guide handy somewhere). I also removed the fake air-duct and panel above that made the job easier but might not be required.
Step 2:
Unplug the bulbs harness(?) from the back of the bulb
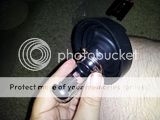
Step 2a:
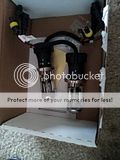
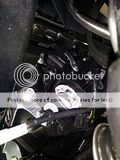
Remove the rubber boot from the housing. It'll look like this
Step 2b:
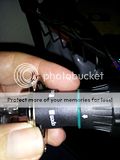
Un clip the bulbs wire bracket from the bulb. on the right hand side you should feel a nub, push in and up and it should pop right out so you can remove the bulb with ease.
Step 3:
Unscrew the metal housing from the bulb

Step 4:
Insert the metal housing into the headlight housing, and lock the clip
Step 5:
Put the boot back into the housing, (this might get tricky) and try to have the boot slip over the metal housing so it will end up covering the words "Open" "Lock" like the image
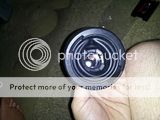
This was the only party i tried to do a bunch of different ways but couldn't' seem to make anything work easy so the above method was what i used to get it all together.
Step 6:
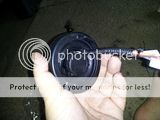
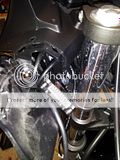
Insert the HID back into the housing which should be inside the headlight housing and lock it in, you may need to apply some force to get it to fit in snugly but it does fit in there may take a couple tries.
Because you won't really be able to see it. It should look like this

Step 7:
Plug in all the wiring (which i failed to get pictures of, but should be pretty easy to figure out)
Step 8:
From the connection with the fuse on it run a line to the positive side of your battery.
Step 9:
From the plug that you plug into the ballast it will have a negative lead, connect that to the negative side of the battery
I ran all wires as close to the tank and out of the way as possible using any wire holders i could along the way to keep the wires hidden as much as possible.
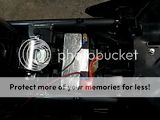
Step 10:
Mount all the things!
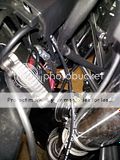
I placed the Ballast in a awkward spot i can see it looking over which i kind of hate but its not in the way of the forks so its hanging out for a bit in that spot. The control box from the ballast that plugs into the HID bulb is mounted under the ballast all on the fairings that i didn't remove. The controller box is actually mounted further down from the ballast because i couldn't find a spot to screw it in correctly i am sure there are other spots to put it and finally the extra HID wiring was wrapped and zip tied to what i believe is the Fairing Stay? its between teh triple tree and isn't in the way.
The kit is a 5000k HID kit from AggRacing (AggRacing.com), i have one of these kits on my R6 and absolutely love the light output and the quality of the product. I ordered a bixeon so that i could keep the HID lighting and still retain a High/Low beam, this kit can also be ordered in a single ballast/bulb configuration but i figured i could put this kit to use on another bike with some modifications down the road.
Here is what came with my kit,


Tools/Materials required:
Hex keys
Patients
Extra Wiring (i used some 14 gauge)
Electrical connectors (Butt splices, spades, etc)
Heat-shrink Tubing (optional)
Step 1:
Remove the left side fairings (should be a guide handy somewhere). I also removed the fake air-duct and panel above that made the job easier but might not be required.
Step 2:
Unplug the bulbs harness(?) from the back of the bulb

Step 2a:
Remove the rubber boot from the housing. It'll look like this

Step 2b:
Un clip the bulbs wire bracket from the bulb. on the right hand side you should feel a nub, push in and up and it should pop right out so you can remove the bulb with ease.

Step 3:
Unscrew the metal housing from the bulb


Step 4:
Insert the metal housing into the headlight housing, and lock the clip
Step 5:
Put the boot back into the housing, (this might get tricky) and try to have the boot slip over the metal housing so it will end up covering the words "Open" "Lock" like the image


This was the only party i tried to do a bunch of different ways but couldn't' seem to make anything work easy so the above method was what i used to get it all together.
Step 6:
Insert the HID back into the housing which should be inside the headlight housing and lock it in, you may need to apply some force to get it to fit in snugly but it does fit in there may take a couple tries.
Because you won't really be able to see it. It should look like this


Step 7:
Plug in all the wiring (which i failed to get pictures of, but should be pretty easy to figure out)
Step 8:
From the connection with the fuse on it run a line to the positive side of your battery.
Step 9:
From the plug that you plug into the ballast it will have a negative lead, connect that to the negative side of the battery

I ran all wires as close to the tank and out of the way as possible using any wire holders i could along the way to keep the wires hidden as much as possible.
Step 10:
Mount all the things!


I placed the Ballast in a awkward spot i can see it looking over which i kind of hate but its not in the way of the forks so its hanging out for a bit in that spot. The control box from the ballast that plugs into the HID bulb is mounted under the ballast all on the fairings that i didn't remove. The controller box is actually mounted further down from the ballast because i couldn't find a spot to screw it in correctly i am sure there are other spots to put it and finally the extra HID wiring was wrapped and zip tied to what i believe is the Fairing Stay? its between teh triple tree and isn't in the way.